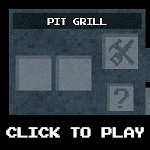
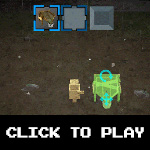
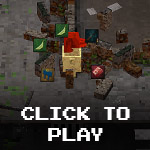
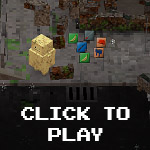
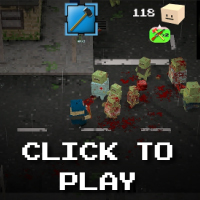
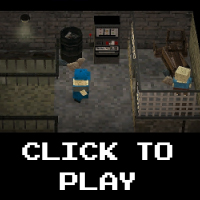
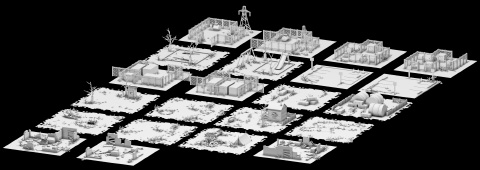
A taste of what’s to come…

Posted in AI, Characters, GUI, Items, Press, Procedural world, Zombox on July 20th, 2016 by Tyson Ibele

So a huge amount of time has passed since the last update.

The good news is that a ton of stuff has been added to the game, and I’ve been working on it harder than ever…I just haven’t posted any updates because I’ve been focusing on getting a playable version of the game ready for beta testing. I’m also knee deep in reworking the NPC/story AI, and want to hold off on posting any real updates until the NPCs are done….since they’re the biggest hurdle left in the game’s development.

However, here’s some stuff that I’ve done since the last time I posted:

  • I’ve added a character upgrade that allows you to pick up, carry and throw zombies
  • there’s a fast-travel subway system you can unlock throughout the world to travel quickly around the map
  • on-screen indicators alert you to nearby hideouts and landmarks
  • many buildings now have basements you can explore
  • there are 4 new hero zombie types, each with special attacks and much higher difficulty
  • a new achievement system was added with 90+ unlockable achievements
  • the Zombox world map has been expanded to be nearly twice as big as before, with tons of new areas, islands, etc
  • crafting system improved: you can build bridges over water, you can build doors into empty doorways, etc
  • craftable structures must now be constructed from the ground-up, after placing them in the world
  • the original book-reading system for unlocking new crafts has been improved
  • structures that require power now indicate visually – through animated electricity textures – whether they are functional
  • new craftable tesla coil trap zaps nearby enemies with electricity
  • save data is now much more efficient – save files are 5x smaller than before, on average
  • items dropped on the ground are now saved to the location they are dropped at, so they won’t disappear when you walk away
  • bombs/molotovs/etc you throw now have an on-screen indicator showing direction of throw, as well as time until detonation

As you can see, I’ve been busy! Once the NPC/story AI gets closer to completion, I’ll post some images and videos of the things listed above so you can see them all in action.

Upgrades, vehicles and perks

Posted in Characters, GUI, Items, Zombox on November 20th, 2015 by Tyson Ibele

While playtesting the game over the course of development, there were a few nagging things that I’ve finally got around to fixing.

Firstly, the old upgrade system was very limited, for several reason:

  • Each upgrade functioned as an on/off switch for a particular character stat. There was no room for focus or progression…once an upgrade was purchased, there was no way to invest in it again or boost its value.
  • The upgrade window itself was limited to 5 upgrades per category, by design…meaning it would need to be overhauled if I wanted to add a 6th upgrade to any category.
  • Upgrades themselves were a pain to implement, since each one required a full looping animation to be displayed beside its description. This looked nice but meant each upgrade took a lot of time to implement.

The new system solves all of these issues:

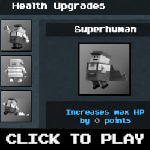
  • In the new system, each upgrade can be progressively boosted several times. So you can pour lots of upgrade points into a single upgrade type (for example, firearm damage or walk speed, etc), or spread your upgrade points out between many different upgrades. This allows for much more precise character customization.
  • The new system looks similar to the crafting help panel, and an unlimited number of upgrades can exist for each category.
  • In the new system, upgrades are displayed as unique icons, rather than animations, so adding new upgrades is very easy and requires minimal artwork.

Overall, the new system looks and functions much better than the old system. Also, there are 54 different upgrade types and about 275 total upgrade possibilities….in contrast to the 50 total upgrades of the old system. So I think the new system will allow players to have a lot more fun testing different character builds, and feeling the satisfaction of progressively upgrading various character proficiencies over time.

Secondly, vehicles have been completely re-written. Unfortunately, with the release of Unity 5, WheelColliders changed in a drastic manner. I previously relied on them for all vehicular motion in the game, and since I could never get the new WheelColliders to function the way I needed them to…I was on the brink of removing driveable vehicles from the game entirely. But while digging around with alternative solutions, I discovered some legacy Raycast-wheel scripts written by an absentee Unity developer named Forest Johnson. I was able to modify his code in such a way that vehicles are now working again, using Raycasts instead of WheelColliders to simulate proper tire friction and velocity. The benefit of this system is that it won’t be made obsolete if Unity devs change the inner workings of WheelColliders again, and I’ve found it to be more stable than the old WheelColliders, because I have full control over all friction settings and am no longer at the mercy of finicky WheelCollider physics.

While re-doing the vehicle motion system, I also implemented the fuel system for motorized vehicles. Any vehicle with a motor now requires fuel before it becomes driveable. Each motorized vehicles has a special fuel slot in its GUI interface, allowing players to re-fuel vehicles with ease. Fuel can be purchased from NPCs, retrieved from care packages, or distilled manually from toxic sludge in the craftable chemistry lab.

Finally, along with hundreds of other little tweaks and changes that I won’t list here, I took a second look at the item perk system previously implemented into the game, and improved it. It used to function similar to the old character upgrade system….once you perked an item, that was it…you could never improve the value of its perk and it was set in stone. The new system, however, is progressive. Items can be continually combined over and over to increase the value of the resulting perks. So instead of two weapons combining to make a perked weapon with a static perk value, you can combine weapons over and over to progressively increase the value of the resulting perk. This means that just because you come across multiple instances of a particular weapon, that doesn’t mean those instances are redundant. Having this progressive perking system means players won’t feel disappointed if they have a large number of the same weapon type, because those can all be combined to create a super powerful weapon with maxed out perks.

Thanks for reading, and stay tuned for future updates!


September 2015 update….

Posted in Characters, Items, Procedural world, Zombox on September 18th, 2015 by Tyson Ibele

So I’ve decided it’s finally time to show some Zombox development progress!

Earlier this year I released a mobile game called ‘The Quest Keeper’ (on iOS and Android), which took up all of my development time for a couple of months. It was a much-needed break from Zombox that also allowed me to perform real-world tests on various Zombox tech (for example, the world in ‘The Quest Keeper’ is procedural, and uses the geometry batching system I originally developed for Zombox).

Anyways, for the last few months I’ve been back at Zombox, chipping away at my long todo list (which is slowly getting shorter!). Here are the highlights of what has been going on:

  • The game world code is finally fully unified. If you saw previous update posts, you’ll know that the game world has things like sewers, NPC bases, zombie traps, etc. Those things were previously coded as ‘special exceptions’ to the normal procedurally generated city tiles. For example, in the old code when you entered a sewer, you would be moved to a special sewer tile outside the range of the normal city tile grid. In that special sewer tile there were different ‘rules’ governing how geometry was generated, where NPCs would be placed, etc. Each set of ‘rules’ were particular to which sewer you were in.

Coding those elements in that manner was a quick and dirty way to get them into the game, but it was also a horribly confusing and cumbersome system to manage, update or augment. The reason for coding them that way originally just boils down to naivety on my part. But with all the experience I’ve gleaned over the years from developing my games, I realized it was finally time to clean up all that horrible code (we’re talking many thousands of lines of code, spread out throughout all of my source files…ie, very messy!).

The result of doing that cleanup is that the game world is now much easier to manage and keep track of. For example, I was able to add 15 new NPC shops to the city sewer system in a matter of minutes, rather than the hours and hours it previously would have taken to sort and manage all code exception cases for each sewer. So hooray for clean code!

  • The world mini-map has been updated. Now the color of the zombie markers shows what each zombie is doing. Green = wandering around. Yellow = investigating a sound. Red = attacking the player. This will help players estimate the amount of danger surrounding zombies pose to them, as they move throughout the world.

  • Radiation zones have been added to the city. The closer you get to the giant meteor which crashed into the center of the map, the more you’re exposed to its deadly radiation. Certain medications have also been added to the game which can cure you of radiation poisoning, and eventually certain clothing items will protect you as well. Without those items guarding you though, venturing close to the meteor will result in certain death.
  • Zombie difficulty is determined by proximity to the crash site. The closer you are to the origin of the deadly radiation, the harder the zombies will be. This means novice/beginner players should stick to the outskirts of the city, while hardcore players can find their challenge near the center.
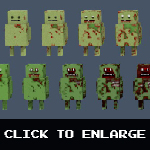
  • Zombie difficulty is visually illustrated by the decay of their bodies. I replaced my old zombie shaders (which were all just varied shades of green), with a new dynamic one that transitions from rotten-looking skin, to completely skinless nastiness, based on the difficulty of the individual zombie. If you’re on the outskirts of the city, where zombies haven’t been exposed to much radiation, the zombies will mostly be spotted and greenish….but if you move closer to the radiation zone, zombie skin will be progressively more decayed to the point where they have no skin at all and look quite ghoulish. This is an easy way to visually signify the difficulty of the zombie you’re about to encounter. This effect, combined with the 60+ varieties of outfits zombies can be found in, makes for a huge amount of visual variation between each zombie.
  • Zombies can bust open doors that are not barricaded. Previously, a zombie could not enter through a closed door at all, and would have to destroy it completely in order to move past it. Now, zombies can smash unprotected doors open with a few hits, which encourages players to take the time to barricade all nearby doorways.
  • Zombies can break any object in their way. Previously, zombies could only attack doors. Now, zombies can attack any object between them and their target, damaging the object until it’s destroyed (or the zombie gets distracted and wanders off).
  • Zombies will no longer spawn inside barricaded buildings. This is a problem that had been bugging me for a while. In past versions of the game, zombies could spawn in any location, so long as that location wasn’t blocked by a prop or in water. This means that if you built a shelter and walked away from it, by the time you return a zombie may have spawned inside of it. But what good is a shelter if it can’t stop zombies from spawning inside of it? The solution to the problem may seem simple at first — after all, why not just tell the game engine that zombies cannot spawn on tiles where the player has built a building? But therein lies the challenge — in a game world where players can build walls in any arbitrary shape or location, how do you even determine where a building is? Or what size it is? Or what shape it is? And how do you perform those types of diagnostic determinations in an efficient way so that they don’t contribute extra lag to the game on mobile devices?

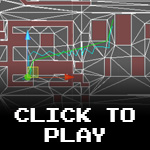
After much deliberation, the solution I found is quite elegant: first, I construct a grid encompassing the entire spawn area. Then, I iterate over all wall objects in the grid area, and mark all grid cells that are located under those wall objects. Finally, I perform a flood-fill over the grid, starting at a known exterior point. Once the flood-fill completes, any non-filled areas are marked as interiors, and zombies are not allowed to spawn on those cells.

If that explanation is not entirely clear to you, here is an animation showing what’s happening behind the scenes. As I construct walls in the game world, notice how they are marked as black lines on the underlying grid (after each progressive update of the grid). Once the walls connect together and enclose a space, the blue flood fill no longer fills that area, and the remaining white area is marked as an interior (which prevents zombies from ever spawning inside in the future). The beauty of this solution is that it requires no complex math or ‘intelligent’ calculations to determine where buildings are and what form they take…it’s really just like using the paint bucket tool in MSPaint.

  • Many new craftable traps, weapons and tools have been added to the game. Here are descriptions of them:

Turret:

The basic turret can be constructed to aid the player in attacking waves of difficult zombies. It has a high rate of fire, and can be pointed in any direction, and has a limited supply of ammo (which can be replenished with a repair tool).
Auto-turret:

The auto turret is a computer-controller version of the basic turret. Once built, it will automatically attack nearby zombies. It has a low rate of fire, but its bullets can penetrate multiple zombies at once.
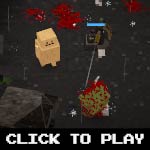
Propeller trap:

Inspired by the propeller traps of Half-Life 2, this trap has four spinning blades which will eviscerate anything in their path. It has limited battery power than can be replenished with a repair tool.
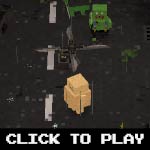
Bear trap:

This is a re-usable trap that does a huge amount of damage to any zombie that steps on it. Once it has sprung, a single hit from a repair tool will reset it and make it ready for use again.
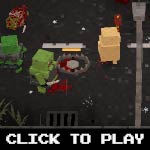
Noise maker:

This craftable contraption generates loud noises which will distract zombies. It can be used to lure zombies into traps. It has limited battery power, which can be replenished with a repair tool.
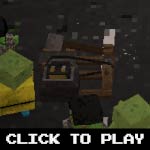
Barbed snag:

This trap slows and damages zombies that walk over it.

Care packages:

Tossing a care package flare on the ground will trigger an overhead military drone to drop a package containing useful supplies down to you. Care package flares attract nearby zombies, but falling care packages can hit and damage zombies below. Care packages themselves are always locked, so they will require a lock-pick to open properly (or you can just break it open with a weapon – but you risk damaging the items inside).
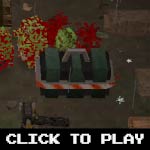
Remote mine:

A remote mine is an improvised explosive device, similar to an in-game pipe bomb, that is triggered by a call from a cell phone. Use these to generate explosions from a distance, at a time of your choosing.
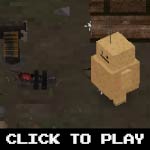
Proximity mine:

The proximity mine is essentially an explosive bear trap. When a zombie steps on it, it will explode — damaging everything around it.
Automatic metal door:

Unlike normal wooden doors, automatic metal doors automatically open/close when you walk through them, and cannot be smashed open by zombies. They are great additions to any shelter.
After a few more small things to do, the next big thing to do is re-do the NPC system…the goal is to tie NPCs into a quest system, so it will take a substantial amount of work to get that done. In the meantime, thanks for your patience!
 

Crafting – final touches…

Posted in Items, Zombox on January 23rd, 2015 by Tyson Ibele

So I think the crafting system is finally “done”. There will be new craftable items I’ll add in the future I’m sure, but the overall mechanics of the system on the whole are finally finished.

Last week I talked about the different types of craftable objects and the way in which certain constructable props can help you craft. This week I implemented the main crafting catalog, which exists to help the player quickly locate crafting recipes to use in game.

To access the menu, a player just has to click the little “?” button in the crafting panel, and it’ll pop up.

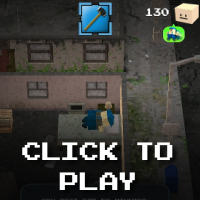
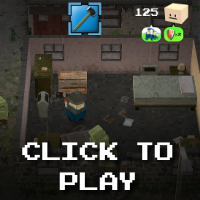
The menu is tailored to show all of the possible recipes that each crafter can produce. Just walk up to a crafter, pop open your inventory window, click the blue “?” button in the crafting panel and you can see all of that particular crafter’s recipes. The crafting window also shows you the name of each ingredient, and whether or not it is currently in your inventory. Recipes are separated into various categories, which can be selected from the tabs on the far left (weapons, items, foods, medicines, etc).

I also tweaked and added a few of the constructable resource gatherers/generators. For example, here is a sped-up .gif of the ‘energy bike’, which can be ridden to generate electricity ammo for weapons like the taser or chainsaw.

Now that the crafting system is fully in place, I can concentrate on a lot of the other loose strings that exist in the overall game’s design. I’m pushing really hard right now to get this game out as soon as possible! Stay tuned for more updates soon!
Crafting continued…

Posted in GUI, Items, Zombox on January 18th, 2015 by Tyson Ibele

So with the successful release of my mobile game Bean Boy (get it on iOS or Android), I’ve been putting all of my efforts into Zombox again, getting all of the kinks worked out of the crafting system.

Last time I discussed the method I’m using to greatly reduce draw calls in the game world, and this time I’d like to talk about the actual implementation of the crafting system in general.

There are currently three ways to craft items in Zombox:

* Static crafts – these are your basic player-made crafts, as well as crafts created by constructable objects whose crafted results appear instantaneously. A static craft is just a craft that allows you to input ingredients, for an immediate output result. Ie, drag your ingredients into the crafting window and *voila*, your resulting item appears instantly.

*Dynamic crafts – these crafts take time to produce their result. Imagine if you planted a seed in the ground — the tree would not appear instantly! The same goes for these crafts. They have a measurable time it takes between inputting your ingredients, and getting an output result. Usually these crafts involve the production/cooking of food.

*Automatic crafts – these crafts are produced by constructable objects that generate resources automatically. Water collectors, solar panels, etc…basically anything that doesn’t require input ingredients in order to produce a result. Like the dynamic crafts, they take time to appear. They also have certain stipulations. For example, solar panels will not generate electricity at night, a water collector won’t collect water when it’s not raining, etc.

It’s taken a lot of work to iron out the bugs, but I’m *nearly* done working out all of the different crafting systems, methods and objects. Right now there are currently *hundreds* of things to craft in-game, and many of the crafting stations are upgradable, allowing players to craft increasingly awesome stuff!

Here are some example .gifs showing the basic interfaces…

To craft, you click the move/rotate icons to place your object, then click the checkmark to build it:

Grilling some fish and growing some plants….note the progress bars that appear on these dynamic crafts letting you know how long it’ll be before it’s done:

Here we see the fish finish cooking…time to eat!:

Here’s a water collector gathering some dirty rain water, which can then be filtered and used for cooking:


Crafting stations…

Posted in Items, Zombox on February 26th, 2014 by Tyson Ibele

Here’s a teaser of some of the new crafting stations you’ll be able to build in Zombox. After you build or upgrade each one, you’ll be able to craft many new items.

Can you guess what some of these will be used for?

Items on the ground…

Posted in Items, Zombox on February 21st, 2014 by Tyson Ibele

So, since the inception of Zombox 3 years ago I’ve wanted to make it possible for items to lie on the ground, outside of any particular container they could be stored in. This is a standard element of many RPGs like Diablo, Torchlight, Minecraft, etc.

The reason that this was never possible in Zombox (up until now) is due to the sheer number of resources required to have an implementation of this idea work. If the actual item geometry is to be displayed on the ground, that’s a lot of extra polygons that an iOS device just wouldn’t be able to handle. If a graphical representation of the item is to be displayed (like, its GUI icon), it would require a lot of draw calls to display each and every icon that is dropped…and every draw call is another hit on the GPU, which would quickly slow the game to a crawl. Batching wouldn’t work on those icons unless they were using a texture atlas, and updating UV/vert lists on a mesh to match icon/world coordinates would be slow.

But then I realized that I could use a particle system to do all of this quickly, and in only 1 draw call. The solution is a bit of a hack that requires “freezing” particles at particular frames on a texture. To elaborate, Unity allows you to tell a particle system to cycle through cells on a texture sheet. This is how animated particles are created — you create a texture sheet with a grid of cells, each containing a different frame of animation. Then you tell Unity’s particle system to cycle through the cells at a given rate, which results in an animated particle texture.

Well, if I create a texture sheet that contains all of my icon textures, and then tell a particle system to advance to a particular cell of that texture sheet and freeze there, I am able to achieve the effect of individual sub-textures of a texture sheet displaying properly on individual particles. Once that’s done, the rest is easy.

So…as a result of this new system, several new things in Zombox are possible:

  • items can be dropped or picked up, anywhere in the game world
  • objects that contain items drop their items on the ground when they are destroyed. The dropped items will be degraded in the process, though
  • when a player approaches an item on the ground, the item will hover around the player, alerting the player that they can examine the item
  • zombies and npcs will now drop their items/weapons when they die. Thus, their items/weapons can be retrieved by the player following their death

Click here to see a scaled-down image of the particle texture sheet I created, which stores all item icons within it. This is the texture that the particle system which displays all dropped items references.

Here are some animations showing various player interactions with dropped items:


Testing the new bicycle rig…

Posted in Items, Zombox on December 9th, 2013 by Tyson Ibele

…apparently it needs some work.


October/November development info dump…

Posted in AI, Characters, GUI, Items, Procedural world, Zombox on November 29th, 2013 by Tyson Ibele

So it’s been almost two months since the last update…I guess that means it’s time for a new one!

I’ve done a huge amount of work on the game in that time…..here’s an overall outline of the new stuff, followed by detailed explanations of each one:

Front-end features:

  • weapons now have durability
  • individual items can now have perks
  • the ailment system (hunger, fatigue, bloodloss) was completely redone.
  • new shaders on everything allow for more precise damage decals

Back-end changes:

  • item import system re-written
  • character controller re-written
  • vehicle management system re-written
  • navgrid pathfinding replaced with navmesh pathfinding

Click any of the following images for previews of some of these changes, or click ‘Read More’ below to see all of the explanations in the full post.

Read more »

Health bonuses, gambling, lock-picking and more…

Posted in GUI, Items, Procedural world, Zombox on March 1st, 2013 by Tyson Ibele

Over the last couple of weeks I’ve added a whole bunch of stuff to Zombox.

  • Health bonuses

In a previous update I showed how getting too low on food, sleep or blood could result in dire consequences for your character. Well now, to even things out, I’ve added health bonuses to the game, which give your character temporary boosts when you get extra food/sleep/medicine. Extra food gives you an attack bonus, which temporarily doubles your attack damage. Getting extra sleep gives you a speed bonus, which temporarily increases your movement speed. Getting extra medicine gives you a defense bonus, which temporarily doubles however many defense points you have at the time (based on your equipment and upgrades).

  • Vending machines

NPC sewers now contain vending machines from which food can be purchased. They’re stocked up with many inexpensive items, although they don’t get restocked so you have to use them wisely.

  • Slot machines

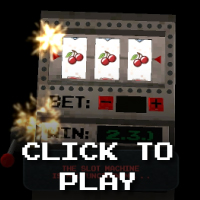
Near NPC stores you’ll now sometimes find slot machines. Gambling on these machines can earn you large prizes and jackpots if you get a 3-of-a-kind match, or cherries. They also have a tendency to malfunction, and each time a malfunction occurs you get a special bonus (free spin, double your winnings, or 2-of-a-kind prizes). Your winnings are multiplied by the amount that you bet each spin…the larger your bet, the more you can win!

  • Lock Picking

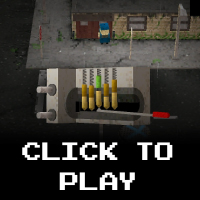
Previously, locks could be picked using either a lock pick item, or Pete. You would walk up to a locked item, press the ‘unlock’ icon and wait. Now, if you want to unlock something you have to manually unlock it yourself, in a lock-pick minigame that pops up on screen. In order to complete the minigame, you have to bump the lock’s pins in the correct order. Bump them out of order and the lock resets. This provides quite a challenge when you’re trying to unlock something while zombies are nearby, since you’re still vulnerable to attack while picking locks. Depending on the security of the lock you’re trying to pick, it could have anywhere from 3 to 7 pins.

  • More buildings and locations

The next big thing I’ll be adding to Zombox is a more fleshed-out overworld, that first requires many new areas and structures to be made. Here are the first 16 that I’ve created…and there are lots more to come! Places like military outposts, quarantine centers, etc, will all be revealed in future updates.