Fire…

Posted in Procedural world, Zombox on November 5th, 2016 by Tyson Ibele

Lots of Zombox development has been happening lately! Progress is still slow because my free time is limited but I’m slowly shortening my todo list.

Most notably, the game now includes a comprehensive fire simulation system. Years ago, I really wanted to include something like this, but the old devices I thought I’d be targeting (iPhone 4) have terrible performance issues when drawing transparent triangles to the screen due to horrible graphics fillrates…so even simple effects like explosion fireballs or burning zombies were causing performance problems. That meant having the ability to display fire effects over large portions of the screen was out of the question and I had removed certain weapons like molotov cocktails from the game in order to remedy the problem.

Now, the silver lining to development taking so long is that mobile technology has progressed to the point where drawing transparent sprites to the screen isn’t that big of an issue any more. So transparent effects like smoke and fire are all things that I can include which won’t kill device framerates. Fire-starting weapons are back in the game too.

So, now everything in the world can be burned with fire, and fire can spread depending on the intensity of the fire and the material it’s spreading to. Concrete and metal are more resilient to flame, whereas wood and cardboard will burn quickly. Fire can also be put out with water. Filling a bucket with any liquid and dumping it on the flames will put them out quickly. Rain will also help snuff out outdoor fires faster.

A taste of what’s to come…

Posted in AI, Characters, GUI, Items, Press, Procedural world, Zombox on July 20th, 2016 by Tyson Ibele

So a huge amount of time has passed since the last update.

The good news is that a ton of stuff has been added to the game, and I’ve been working on it harder than ever…I just haven’t posted any updates because I’ve been focusing on getting a playable version of the game ready for beta testing. I’m also knee deep in reworking the NPC/story AI, and want to hold off on posting any real updates until the NPCs are done….since they’re the biggest hurdle left in the game’s development.

However, here’s some stuff that I’ve done since the last time I posted:

  • I’ve added a character upgrade that allows you to pick up, carry and throw zombies
  • there’s a fast-travel subway system you can unlock throughout the world to travel quickly around the map
  • on-screen indicators alert you to nearby hideouts and landmarks
  • many buildings now have basements you can explore
  • there are 4 new hero zombie types, each with special attacks and much higher difficulty
  • a new achievement system was added with 90+ unlockable achievements
  • the Zombox world map has been expanded to be nearly twice as big as before, with tons of new areas, islands, etc
  • crafting system improved: you can build bridges over water, you can build doors into empty doorways, etc
  • craftable structures must now be constructed from the ground-up, after placing them in the world
  • the original book-reading system for unlocking new crafts has been improved
  • structures that require power now indicate visually – through animated electricity textures – whether they are functional
  • new craftable tesla coil trap zaps nearby enemies with electricity
  • save data is now much more efficient – save files are 5x smaller than before, on average
  • items dropped on the ground are now saved to the location they are dropped at, so they won’t disappear when you walk away
  • bombs/molotovs/etc you throw now have an on-screen indicator showing direction of throw, as well as time until detonation

As you can see, I’ve been busy! Once the NPC/story AI gets closer to completion, I’ll post some images and videos of the things listed above so you can see them all in action.

Saving the world!…to disk?

Posted in Procedural world, Zombox on December 4th, 2015 by Tyson Ibele

The problem:

Since the inception of Zombox almost 5 years ago, one thing I’ve never addressed is how the save system will work.

For a long time in gaming, it was fairly common for game designers to provide players with some kind of manual ‘save’ menu (whether in a user interface, or within gameplay itself). But modern players — especially on mobile — just assume that their progress will be saved when they close the game, and resumed when they re-open it. Implementing an auto-save feature which provides that functionality can come with many challenges…especially for Zombox. To list a few:

  • Zombox is a massive open-world game with a city spanning over 20,000 individual ground tiles, and over 100,000 individual interactive objects per map. Since players can change the state of these objects at any time (destroy, repair, put items in, take items out, etc), their states need to be saved between plays.
  • Zombox needs to run smoothly on mobile devices, and can’t freeze every time the player needs to save.
  • Due to the constantly changing nature of the game world, saves need to happen often.
  • Save data needs to be small in size, because nobody wants their mobile device storage space eaten up by huge save files

Read more »

September 2015 update….

Posted in Characters, Items, Procedural world, Zombox on September 18th, 2015 by Tyson Ibele

So I’ve decided it’s finally time to show some Zombox development progress!

Earlier this year I released a mobile game called ‘The Quest Keeper’ (on iOS and Android), which took up all of my development time for a couple of months. It was a much-needed break from Zombox that also allowed me to perform real-world tests on various Zombox tech (for example, the world in ‘The Quest Keeper’ is procedural, and uses the geometry batching system I originally developed for Zombox).

Anyways, for the last few months I’ve been back at Zombox, chipping away at my long todo list (which is slowly getting shorter!). Here are the highlights of what has been going on:

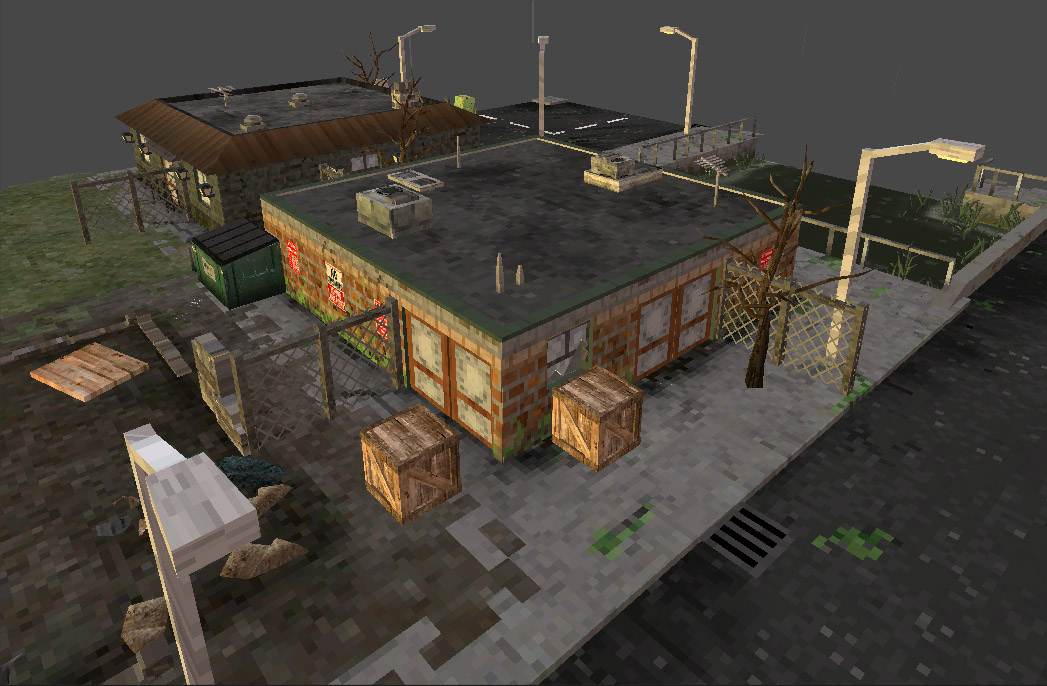
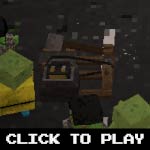
  • The game world code is finally fully unified. If you saw previous update posts, you’ll know that the game world has things like sewers, NPC bases, zombie traps, etc. Those things were previously coded as ‘special exceptions’ to the normal procedurally generated city tiles. For example, in the old code when you entered a sewer, you would be moved to a special sewer tile outside the range of the normal city tile grid. In that special sewer tile there were different ‘rules’ governing how geometry was generated, where NPCs would be placed, etc. Each set of ‘rules’ were particular to which sewer you were in.

Coding those elements in that manner was a quick and dirty way to get them into the game, but it was also a horribly confusing and cumbersome system to manage, update or augment. The reason for coding them that way originally just boils down to naivety on my part. But with all the experience I’ve gleaned over the years from developing my games, I realized it was finally time to clean up all that horrible code (we’re talking many thousands of lines of code, spread out throughout all of my source files…ie, very messy!).

The result of doing that cleanup is that the game world is now much easier to manage and keep track of. For example, I was able to add 15 new NPC shops to the city sewer system in a matter of minutes, rather than the hours and hours it previously would have taken to sort and manage all code exception cases for each sewer. So hooray for clean code!

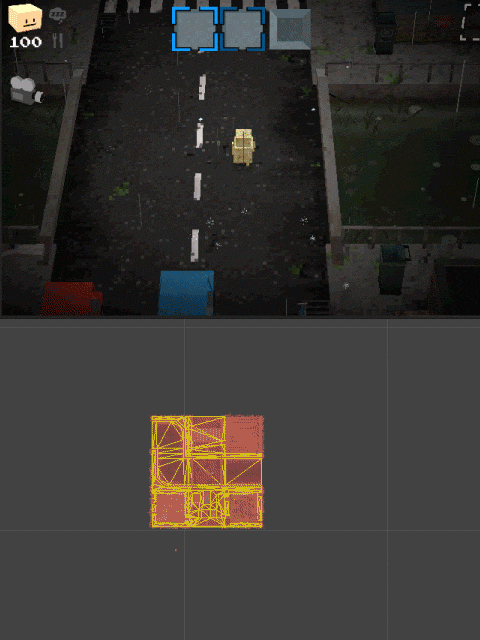
  • The world mini-map has been updated. Now the color of the zombie markers shows what each zombie is doing. Green = wandering around. Yellow = investigating a sound. Red = attacking the player. This will help players estimate the amount of danger surrounding zombies pose to them, as they move throughout the world.

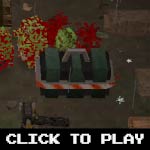
  • Radiation zones have been added to the city. The closer you get to the giant meteor which crashed into the center of the map, the more you’re exposed to its deadly radiation. Certain medications have also been added to the game which can cure you of radiation poisoning, and eventually certain clothing items will protect you as well. Without those items guarding you though, venturing close to the meteor will result in certain death.

  • Zombie difficulty is determined by proximity to the crash site. The closer you are to the origin of the deadly radiation, the harder the zombies will be. This means novice/beginner players should stick to the outskirts of the city, while hardcore players can find their challenge near the center.
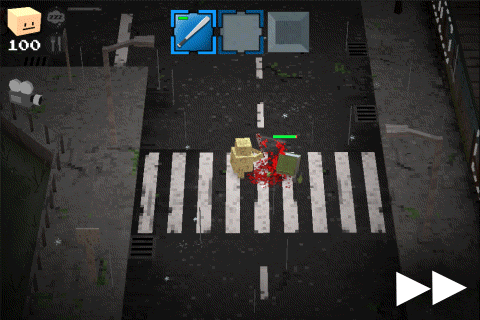
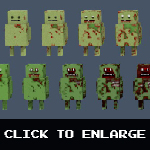
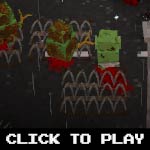
  • Zombie difficulty is visually illustrated by the decay of their bodies. I replaced my old zombie shaders (which were all just varied shades of green), with a new dynamic one that transitions from rotten-looking skin, to completely skinless nastiness, based on the difficulty of the individual zombie. If you’re on the outskirts of the city, where zombies haven’t been exposed to much radiation, the zombies will mostly be spotted and greenish….but if you move closer to the radiation zone, zombie skin will be progressively more decayed to the point where they have no skin at all and look quite ghoulish. This is an easy way to visually signify the difficulty of the zombie you’re about to encounter. This effect, combined with the 60+ varieties of outfits zombies can be found in, makes for a huge amount of visual variation between each zombie.

  • Zombies can bust open doors that are not barricaded. Previously, a zombie could not enter through a closed door at all, and would have to destroy it completely in order to move past it. Now, zombies can smash unprotected doors open with a few hits, which encourages players to take the time to barricade all nearby doorways.
  • Zombies can break any object in their way. Previously, zombies could only attack doors. Now, zombies can attack any object between them and their target, damaging the object until it’s destroyed (or the zombie gets distracted and wanders off).
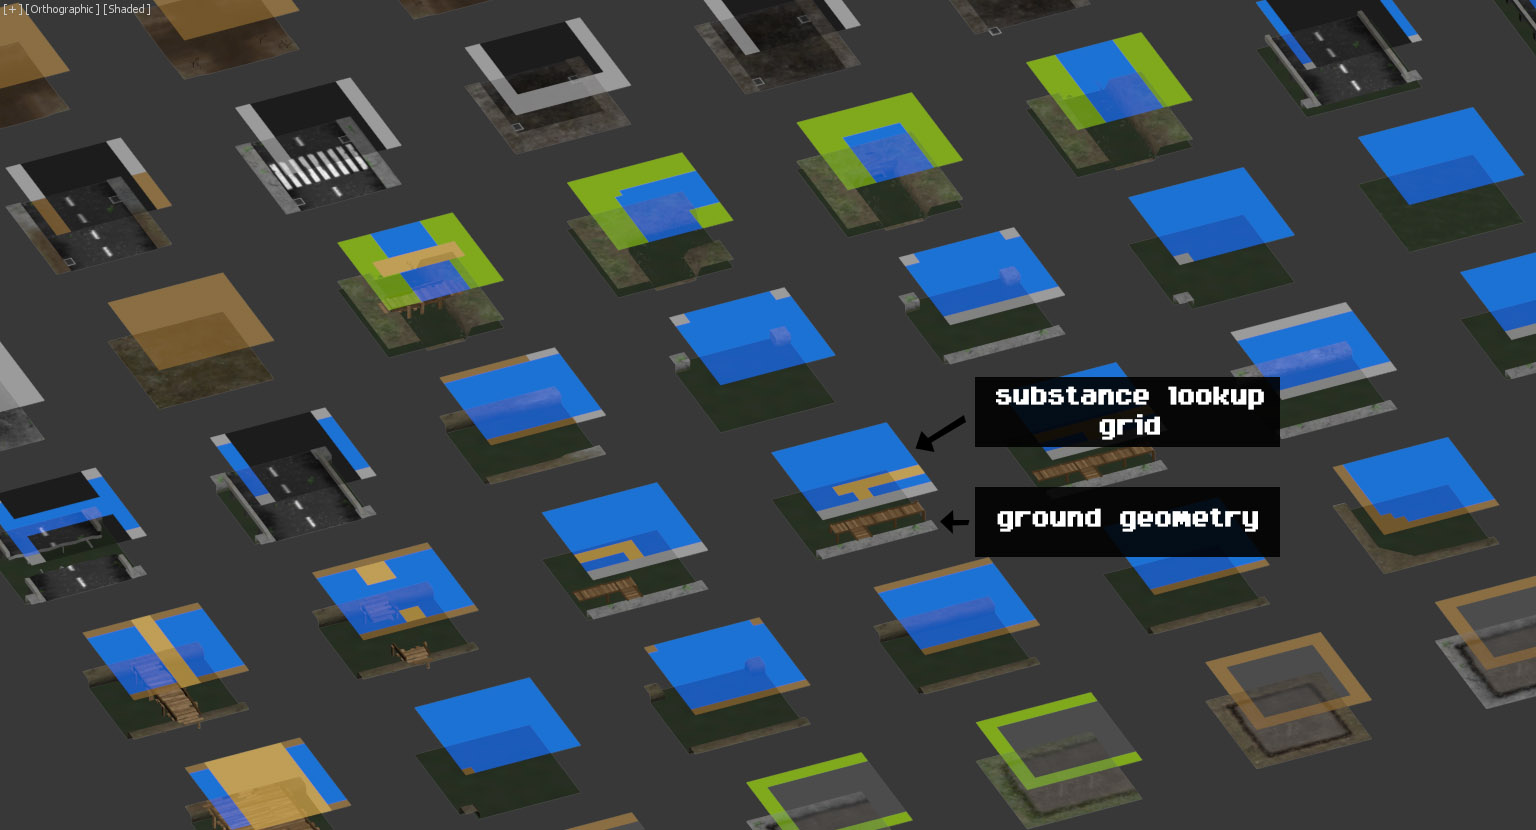
  • Zombies will no longer spawn inside barricaded buildings. This is a problem that had been bugging me for a while. In past versions of the game, zombies could spawn in any location, so long as that location wasn’t blocked by a prop or in water. This means that if you built a shelter and walked away from it, by the time you return a zombie may have spawned inside of it. But what good is a shelter if it can’t stop zombies from spawning inside of it? The solution to the problem may seem simple at first — after all, why not just tell the game engine that zombies cannot spawn on tiles where the player has built a building? But therein lies the challenge — in a game world where players can build walls in any arbitrary shape or location, how do you even determine where a building is? Or what size it is? Or what shape it is? And how do you perform those types of diagnostic determinations in an efficient way so that they don’t contribute extra lag to the game on mobile devices?

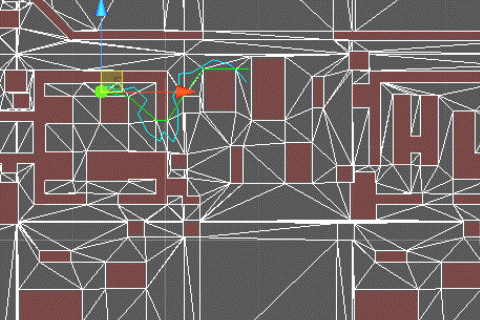
After much deliberation, the solution I found is quite elegant: first, I construct a grid encompassing the entire spawn area. Then, I iterate over all wall objects in the grid area, and mark all grid cells that are located under those wall objects. Finally, I perform a flood-fill over the grid, starting at a known exterior point. Once the flood-fill completes, any non-filled areas are marked as interiors, and zombies are not allowed to spawn on those cells.

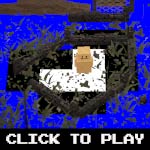
If that explanation is not entirely clear to you, here is an animation showing what’s happening behind the scenes. As I construct walls in the game world, notice how they are marked as black lines on the underlying grid (after each progressive update of the grid). Once the walls connect together and enclose a space, the blue flood fill no longer fills that area, and the remaining white area is marked as an interior (which prevents zombies from ever spawning inside in the future). The beauty of this solution is that it requires no complex math or ‘intelligent’ calculations to determine where buildings are and what form they take…it’s really just like using the paint bucket tool in MSPaint.

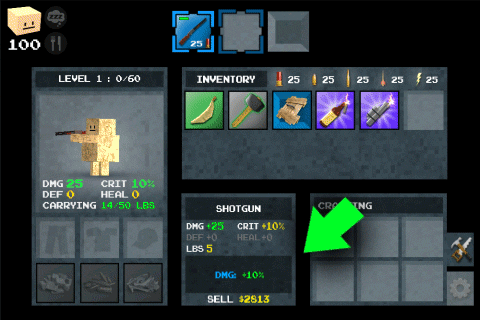
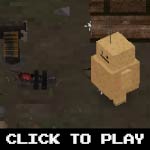
  • Many new craftable traps, weapons and tools have been added to the game. Here are descriptions of them:

Turret:

The basic turret can be constructed to aid the player in attacking waves of difficult zombies. It has a high rate of fire, and can be pointed in any direction, and has a limited supply of ammo (which can be replenished with a repair tool).

Auto-turret:

The auto turret is a computer-controller version of the basic turret. Once built, it will automatically attack nearby zombies. It has a low rate of fire, but its bullets can penetrate multiple zombies at once.

Propeller trap:

Inspired by the propeller traps of Half-Life 2, this trap has four spinning blades which will eviscerate anything in their path. It has limited battery power than can be replenished with a repair tool.

Bear trap:

This is a re-usable trap that does a huge amount of damage to any zombie that steps on it. Once it has sprung, a single hit from a repair tool will reset it and make it ready for use again.

Noise maker:

This craftable contraption generates loud noises which will distract zombies. It can be used to lure zombies into traps. It has limited battery power, which can be replenished with a repair tool.

Barbed snag:

This trap slows and damages zombies that walk over it.

Care packages:

Tossing a care package flare on the ground will trigger an overhead military drone to drop a package containing useful supplies down to you. Care package flares attract nearby zombies, but falling care packages can hit and damage zombies below. Care packages themselves are always locked, so they will require a lock-pick to open properly (or you can just break it open with a weapon – but you risk damaging the items inside).

Remote mine:

A remote mine is an improvised explosive device, similar to an in-game pipe bomb, that is triggered by a call from a cell phone. Use these to generate explosions from a distance, at a time of your choosing.

Proximity mine:

The proximity mine is essentially an explosive bear trap. When a zombie steps on it, it will explode — damaging everything around it.

Automatic metal door:

Unlike normal wooden doors, automatic metal doors automatically open/close when you walk through them, and cannot be smashed open by zombies. They are great additions to any shelter.

After a few more small things to do, the next big thing to do is re-do the NPC system…the goal is to tie NPCs into a quest system, so it will take a substantial amount of work to get that done. In the meantime, thanks for your patience!


Multithreading and more…

Posted in Procedural world, Zombox on January 30th, 2015 by Tyson Ibele

So since the very inception of Zombox, I’ve always been fighting with Unity, trying to get it to pump out as many polygons as possible without getting too many slowdowns on mobile devices. Zombox features a huge open world, so this has always been a massive challenge.

When I first started working on the game, I made sure everything was super low poly. Then I learned that Unity can batch geometry to the GPU if it’s low-poly and shares the same material — so I made sure all the geometry in the city used only one material with a large texture atlas. Then when that wasn’t enough, I simplified the geometry on everything further. After that, I developed a seamless world-culling system so that the only geometry that would ever be loaded is what would be on-screen at the time. Even then, I was always treading a very fine line with regards to performance. I had to be very careful not to group too many objects together in the city or draw calls would get too high and the game would chug.

In December I described my custom batching solution to the draw call problem. However, while my batching system greatly reduced draw calls, it created another problem that was still lingering: the batching system itself has a pretty high CPU overhead. It’s not high enough to negate its positive effect on overall performance, but it’s still high enough to be a pretty serious problem. After all, nobody wants to experience annoying framerate hits every few seconds as they walk around the game world.

This week I realized that basically all mobile devices I’m targeting have at least 2 cores in their main CPU (iPhone 4S and above). So with that in mind, I decided to try multithreading the batching system I developed. One of the downsides of Unity is that you cannot access any UnityEngine classes from secondary threads (thereby making multithreading for all built-in Unity objects impossible). But, one of the upsides of my new batching system is that it doesn’t actually rely on any UnityEngine classes! So with that in mind, I was able to quickly and easily shift all mesh calculations (besides those that actually assign the final vert/uv/color/triangles sets to the Unity Mesh objects) to a second thread.

And voila! This idea turned out to work almost like magic! I can now pump *tons* of geometry at my batching system with almost no impact on the core thread of the game — meaning that no matter how complicated the city’s geometry is (within reason), it will never cause the game to stutter or slow down. The game actually runs faster now, with *twice* the amount of on-screen geometry, than it did before with half that geometry!

So this has allowed me to add some stuff to the game that I’ve been wanting to add for years, but never knew how I could do it without killing performance — namely, grass, twigs, stones, debris, and all sorts of other ground details! For years the game has consisted of nothing more than buildings and props on top of completely flat textured planes. There were a few minor ground details scattered throughout, but they were very limited in their distribution to keep them from lagging the game. But not anymore! Check out this before/after animation and take note of all the extra ground detail:

All of this is now easily possible, without any impact on the game’s overall performance! It has been an exciting week for sure.

Now, multithreading my batching system was only one half of what was accomplished this last week. The other half was figuring out a simple, memory-efficient way of being able to quickly identify what type of substance each point of the city’s ground surface consists of. In order to add grass, and other details throughout the world, I need to know where those details should go. After all, we don’t want grass growing inside houses or on the road, for example.

My solution was to define a grid in 3d space, in 3d studio max, that uses material IDs to specify different types of ground substances. The grid system is resolution-independent so that some ground tiles can have less dense grids than others (after all, we don’t need hundreds of grid cells to tell us that the middle of the ocean is composed of water, but we might need hundreds of cells to differentiate between grass patches, mud patches, concrete patches and other substances within the city). This grid is then exported from 3dsmax into a pre-built C# file that auto-loads this substance information into Zombox without any extra computations/loading required. The result is very fast grid->substance lookups that give the game quick access to all the information it needs about what is under the player’s fee, with very little memory overhead.

And the added benefit of this system is that being able to identify ground substances means I can allow the player to do things like…dig! We wouldn’t want the player to be able to dig dirt out of the sidewalk or the road…but if we can find out that the player is standing on some dirt…well, it would make sense to allow for some digging there! This substance lookup system is perfect for that. As you can see, when the player steps onto dirt, the shovel icon appears and he can dig for dirt/clay, which can then be used in various crafting recipes. The substance information is also useful for other purposes as well….it’s an easy way for me to perform checks that prevent players from being able to craft over water, or it allows me to do things like add particle effects for when the player is running through tall grass, etc. Eventually it might lead to the inclusion of other easter eggs…like the ability to dig up treasure?….We’ll see!

Here’s an animation of the player digging up dirt items, which can later be collected and used for crafting:

Apologies for the long post, hopefully some people find it informative!


World generation and crafting…

Posted in Procedural world, Zombox on December 8th, 2014 by Tyson Ibele

Hey everyone! This is my first official Zombox update in a long, long time.

Since Jungle Moose is out, and Bean Boy is 99% done, I’ve been back working on Zombox.

I left off in March, having finished modelling most of the craftable structures in the game. But one big thing was looming pretty far over my head….

If any of you are game developers yourselves, you’ll know that ‘draw calls’ are the bane of many developers existences (especially those targeting mobile platforms). A draw call is basically an instruction sent to a device’s video card, that tells it to render some geometry to the screen. So, for example, if you have five separate objects you’d like to render, then that will require five separate draw calls (assuming the game engine doesn’t implement any type of batching system). Draw calls are ‘expensive’, which means that they take a lot of processing time to send to the graphics card, and for that reason you always want as few draw calls as possible.

Unity’s rendering pipeline includes a batching system, that can group objects and send them together as a single draw call. The batching system has many quirks, the biggest one being that it can only attach a very small amount of geometry together for each ‘batch’. Up until now it was what I was relying on to render the Zombox world.

However, with the addition of the crafting system into Zombox….I was presented with a pretty major problem: if the user is able to create objects anywhere in the world, then there is nothing stopping them from creating tons of different objects on screen in the same area. Typically, any location within the city in Zombox (where the user hasn’t crafted anything) takes about 30-40 draw calls to render (that’s excluding draw calls for the GUI). That’s already pretty heavy….but if the user were to craft a bunch of objects in that area, that number could increase way past what most mobile devices could handle at an acceptable framerate (even with built-in batching). We’re talking possibly over a hundred draw calls just to render the scene geometry alone! That’s not including zombies or NPCs or even the main character! That’s totally unacceptable and has been a major roadblock in the game’s development.

Earlier in the year I attended a Unity meetup in Toronto where Jim McGinley spoke about procedural generation in his game Endlight. He presented a novel solution for quickly updating meshes in Unity with thousands of changing vertices and arbitrary vertex counts (a process that is normally very slow when vertex counts change): at the start of the game, he generated a separate mesh for each possible vertex count, up to a max vertex count (so if he knew his biggest mesh would have 1000 vertices, he generated 1000 meshes and set their vertex counts from 1 to 1000, respectively). Then when he quickly needed to generate a mesh with, say, 874 vertices, he would grab the pre-generated mesh with 874 vertices, pop his new vertices into it, and hide all the other meshes. This prevented him from having to re-send new meshes to the GPU each frame because all of those pre-generated meshes were already in the GPU, just waiting for their vertex lists to be updated. And the whole thing would only take 1 draw call to render.

Now, that solution worked great for him, but it is also quite memory intensive — and Zombox needs to conserve memory to make room for all of the other procedural content that gets loaded. So generating 1000 meshes isn’t a viable option for me….but it did lead me to come up with the solution I’m using now. Here’s how my current solution works:

  • The scene geometry is imported with a custom tool to automatically cache all base city meshes for quick reading of their vertex/triangle lists
  • When the game starts, I generate about a dozen meshes in a mesh pool, each with a few thousand triangles/verts. The lower the vertex count of each mesh, the less processing time required to update it. However, the more meshes in the pool, the higher the resulting draw call count will be. So, setting the total triangle/vert count to a few thousand is a good balance.
  • Each of the triangles in the mesh are added to a pool of “free” triangles
  • When the city begins to load, instead of displaying each object with an individual MeshRenderer component (which would then be batched and sent to the GPU when it’s time to render), each object instead grabs however many triangles it needs from the pool, and positions the vertices of those triangles to match all of the vertices in its cached mesh. It does the same for its texture verts (UVs). Any triangles used to generate the object are then removed from the “free” triangle pool
  • If, at any point, the “free” triangle pool ever gets used up before all base city meshes are displayed, I simply add a new mesh to the mesh pool and pop its triangles into the triangle pool, and keep going. No matter how many objects a user crafts on-screen, I’ll never need more than about 20 pooled meshes to draw them all, considering that on-screen vertex counts can only ever get so high before there’s no more room to craft things in screen-space
  • Any time an object is unloaded from the game, its pool triangles are added back to the “free” triangle pool, and all of the verts that were used are set to be degenerate (which causes them not to render anymore)
  • Any time an object is updated, I cycle through its pool triangles and just update their vertex locations

Now, that’s a pretty big mouthful of information — what does it entail? Well it means that I can render the entire Zombox world, no matter how many objects the user crafts, in about 12-20 draw calls….which is pretty amazing!

That said, there is a performance hit that occurs by doing all my custom batching/pooling operations. But, by spreading those operations out over a few frames and not doing all of the geometry calculations at once, the hit is small enough that it doesn’t affect the game’s framerate. So it’s a pretty great solution to a pretty massive problem! Caching all of my mesh data beforehand also means that I don’t need to do any allocations per frame in order to read mesh triangle/vertex data. The downside to caching is that it means you have to create a duplicate of your mesh data in memory, on top of what Unity already caches under the hood. My solution to that was to scrap FBX import of the city geometry all together and write my own mesh import system, which means I’m only ever holding 1 copy of each city mesh in memory at once, and I still don’t need to do any extra allocations to read geometry data.

So, as you can see, I’ve been busy despite my silence! But the results have been worth it.

Not everything I’ve been working on has been under the hood, though. I’ve also been working on the crafting interface and getting all the new craftable structures implemented into the game! The crafting interface (that allows you to place and rotate objects you want to craft) is still a work in progress, but you can see a result of some construction in the image at the top of this post.

Thanks to everyone for you continued support, and look forward to more Zombox updates soon!

Navmesh info…

Posted in AI, Procedural world, Zombox on December 13th, 2013 by Tyson Ibele

Here is a short illustrated write-up explaining how navmeshes are generated per-tile in Zombox. The illustration also demonstrates how non axis-aligned obstacles are handled.

October/November development info dump…

Posted in AI, Characters, GUI, Items, Procedural world, Zombox on November 29th, 2013 by Tyson Ibele

So it’s been almost two months since the last update…I guess that means it’s time for a new one!

I’ve done a huge amount of work on the game in that time…..here’s an overall outline of the new stuff, followed by detailed explanations of each one:

Front-end features:

  • weapons now have durability
  • individual items can now have perks
  • the ailment system (hunger, fatigue, bloodloss) was completely redone.
  • new shaders on everything allow for more precise damage decals

Back-end changes:

  • item import system re-written
  • character controller re-written
  • vehicle management system re-written
  • navgrid pathfinding replaced with navmesh pathfinding

Click any of the following images for previews of some of these changes, or click ‘Read More’ below to see all of the explanations in the full post.

Read more »

Swimming…

Posted in Characters, Procedural world, Zombox on October 11th, 2013 by Tyson Ibele

So, it used to be that when you’d jump in water you’d immediately die. But that’s no fun!! So….


As you can see, you can only climb out of the water if there’s nothing blocking the ledge in front of you.

Also, I’m verrrry close to having all of the refactored city generation code finished. Hopefully after that point, I’ll be able to post more frequent updates!


Building details…

Posted in Procedural world, Zombox on August 30th, 2013 by Tyson Ibele

So I’m getting closer to having the entire city generation engine re-written. It’s been a huge project (since it makes up a huge chunk of the game’s code and had to be completely re-written from scratch)….but the benefits have been awesome (as explained in previous posts).

In the process of re-writing the way that cities are generated, I’ve also changed the way that buildings are generated. Currently there are 15 different types of buildings (hospitals, houses, banks, stores, etc). Each building type had a specific custom interior (so stores have checkout counters, houses have kitchens and TVs, hospitals have beds, etc)…but in the old system the exteriors of the buildings were completely randomized. This means that a hospital might end up with the same roof and brick color as a house, etc.

The problem with that approach is that it becomes very difficult to tell buildings apart, without going inside to see the interior decorations. That also results in a very boring-looking city…where all buildings are essentially ‘the same’, in the sense that their colors and exterior decorations all come from the same set of options.

Since I’m overhauling the whole system, I figured it would be a good time to change how buildings are generated. Now, each building type has a unique set of possible walls and roofs that are specific to that kind of building. So, as you’re walking around the city, you can identify buildings by their exterior color and decor. When you see a steeple, you know you’re near a church. When you see an envelope sign, you know you’re near a post office. When you see a bunch of movie posters, you know you’re near a video store, etc.

Here’s a screencap showing a viewport preview of all the possible walls for each of the 15 building types.

Here’s a screencap showing a viewport preview of the possible roofs for the 15 building types.

As buildings are generated, first the ‘type’ of building is chosen, then its walls are taken from the corresponding group of possible walls, and then a roof is chosen from the corresponding group of roofs.

Here’s a screencap illustrating what a couple of buildings end up looking like, once their geometry is generated from the prefab objects shown above.

 Also for those who haven’t yet noticed…comments now require registration/login. It’s super easy to do, and avoids some of the problems that were happening earlier (with people posting under other peoples’ names, pretending to be them). If you have any issues with the registration/login system, or someone else has taken a username you previously posted under….feel free to contact me and let me know and we’ll try to resolve the issue.